M5Stack: New Relic にメトリクスを送信する
概要
M5Stack でセンサーから取得した値を、テレメトリデータプラットフォームである New Relic に送信します。収集したデータをもとに、ダッシュボードで閲覧、閾値をもとにアラートしたり、API で取得して活用することができます。一人で使用するなら毎月 100 GB まで、13 ヵ月間のデータを無料で保存できます。
Metric API
New Relic にメトリクスを送信するための各種 SDK やエージェントが存在しますが、以下の WebAPI を呼ぶのがシンプルです。
Report metrics via the Metric API
curl で呼ぶ場合の例
NEW_RELIC_API_KEY=xxxxxxxxxxxxxxxxxxxxxxxxxxxxxxxxxxxxxxxx
METRICS_NAME=test
METRICS_VALUE=30
NAME=test
curl -X POST "https://metric-api.newrelic.com/metric/v1" \
    -H "Api-Key: ${NEW_RELIC_API_KEY}" \
    -H "Content-Type: application/json" \
    --data "[
        {
            \"metrics\":[
                {
                    \"name\": \"${METRICS_NAME}\",
                    \"type\": \"gauge\",
                    \"value\": ${METRICS_VALUE},
                    \"timestamp\": $(date +%s),
                    \"attributes\": {\"name\": \"${NAME}\"}
                }
            ]
        }
    ]"
実装例
送信処理
#include <Arduino.h>
#include <HTTPClient.h>

#define NEW_RELIC_API_KEY "xxxxxxxxxxxxxxxxxxxxxxxxxxxxxxxxxxxxxxxx"

void sendMetrics(time_t timestamp, const char *metricsName, float metricsValue, const char*name)
{
  HTTPClient http;
  char payload[128];

  http.begin("https://metric-api.newrelic.com/metric/v1");
  http.addHeader("Content-Type", "application/json");
  http.addHeader("Api-Key", NEW_RELIC_API_KEY);
  sprintf(payload,
    "[{\"metrics\": [{\"name\": \"%s\", \"type\": \"gauge\", \"value\": %f, \"timestamp\": %ld, \"attributes\": {\"name\": \"%s\"}}]}]",
    metricsName, metricsValue, timestamp, name
  );
  http.POST(String(payload));
  http.end();
}
センサーデータを取得して送信する場合の例
#include <SHT3X.h>
#include <QMP6988.h>

void loop()
{
  SHT3X sht30;
  QMP6988 qmp6988;
  time_t ts = time(nullptr);

  if (sht30.get() != 0) return;
  float temperature = sht30.cTemp;
  float humidity = sht30.humidity;
  sendMetrics(ts, "temperature", temperature, "M5-test");
  sendMetrics(ts, "humidity", humidity, "M5-test");

  if (!qmp6988.init()) return;
  float pressure = qmp6988.calcPressure() / 100;
  sendMetrics(ts, "pressure", pressure, "M5-test");

  delay(30000);
}
閲覧
New Relic のダッシュボードで、以下のように表示できました!
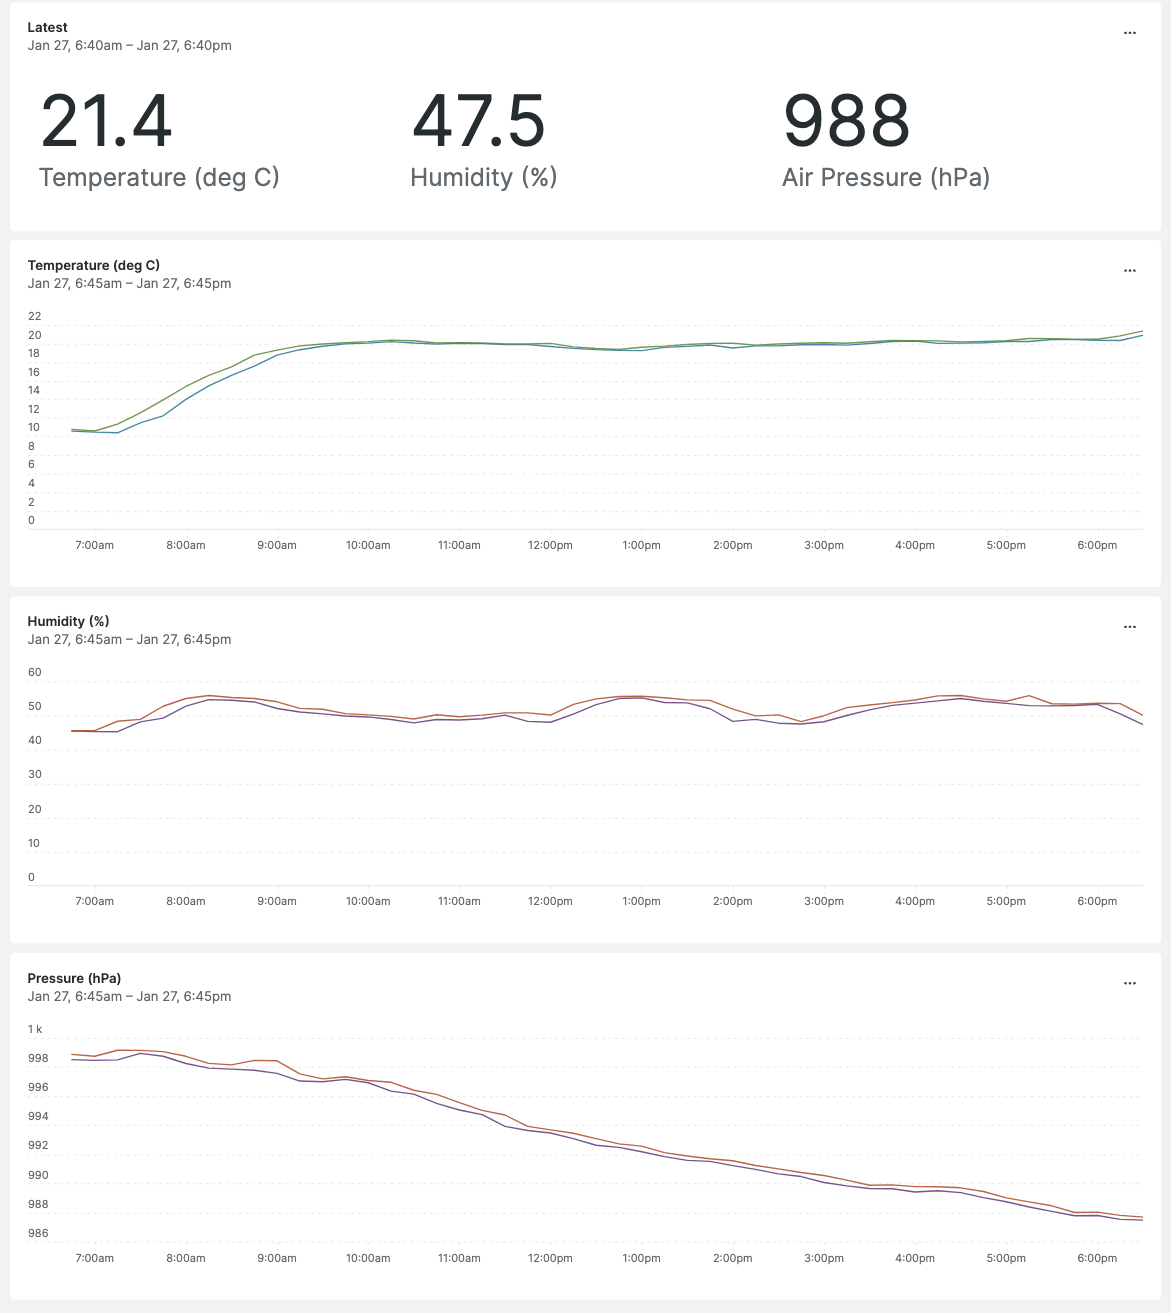
クエリ例)
SELECT min(temperature), max(temperature) FROM Metric WHERE name = 'M5-test' SINCE 1 DAY AGO TIMESERIES